Adding an AWS Template
Overview
CloudLabs Template is the base of the hands-on lab environment. You can do a variety of configurations under Templates, such as adding pre-requisites, enabling custom policies for users, and much more.
Here we will learn more about how to work with the CloudLabs Template.
Prerequisites
Before you begin adding an AWS Template to CloudLabs, ensure you have the following prerequisites:
Admin access to CloudLabs Admin Portal (If access is unavailable, kindly reach out to your point of contact or CloudLabs Support).
Lab Guide/Reference documents containing necessary instructions, often provided through GitHub which are in GitMarkdown format.
Add Template
Log in to the CL portal and navigate to the required tenant (WIZ). On the left-hand side of the page, you will see the Template section.
Navigate to the Templates (1) section that is available in the left menu and click on the + ADD (2) button given in the top right corner.

This template page is divided into three sections:
A. The fields and their functionality are listed below:
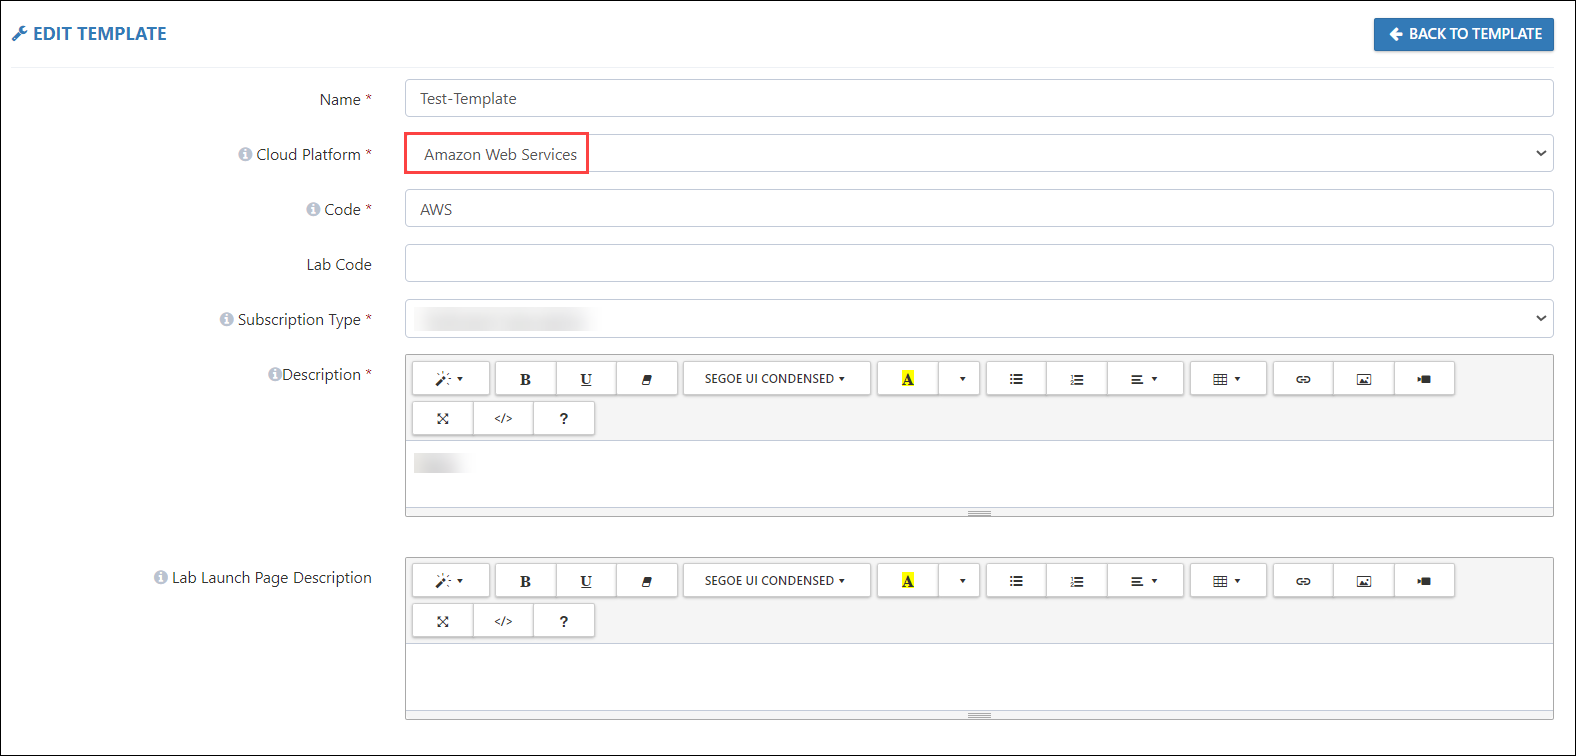
Name: To identify the lab, give a name to the Template.
Cloud Platform: CloudLabs supports three cloud platforms - Microsoft Azure, Amazon Web Services, and Google Cloud Platform.
Code: This code will be included in the name of the policy that will be created. As an example, if you use the code AWS, The user's Policy will be named AWSxxxxx-xxxxxxx-PolicyDefinition, where AWS is a lab code, xxxxx is the Cloudlabs ID, and xxxxxxx is the CloudLabs-assigned user Deployment ID, PolicyDefinition is the default Suffix.
Subscription Type: select the Subscription type from one of the types below that CloudLabs offers. It is highly recommended that you apply access and policy constraints for the chosen subscription type.
Dedicated Subscription : One of the AWS Organization Member account will be given to the one user.
Dedicated Tenant: When a access to the Organization root account is needed.
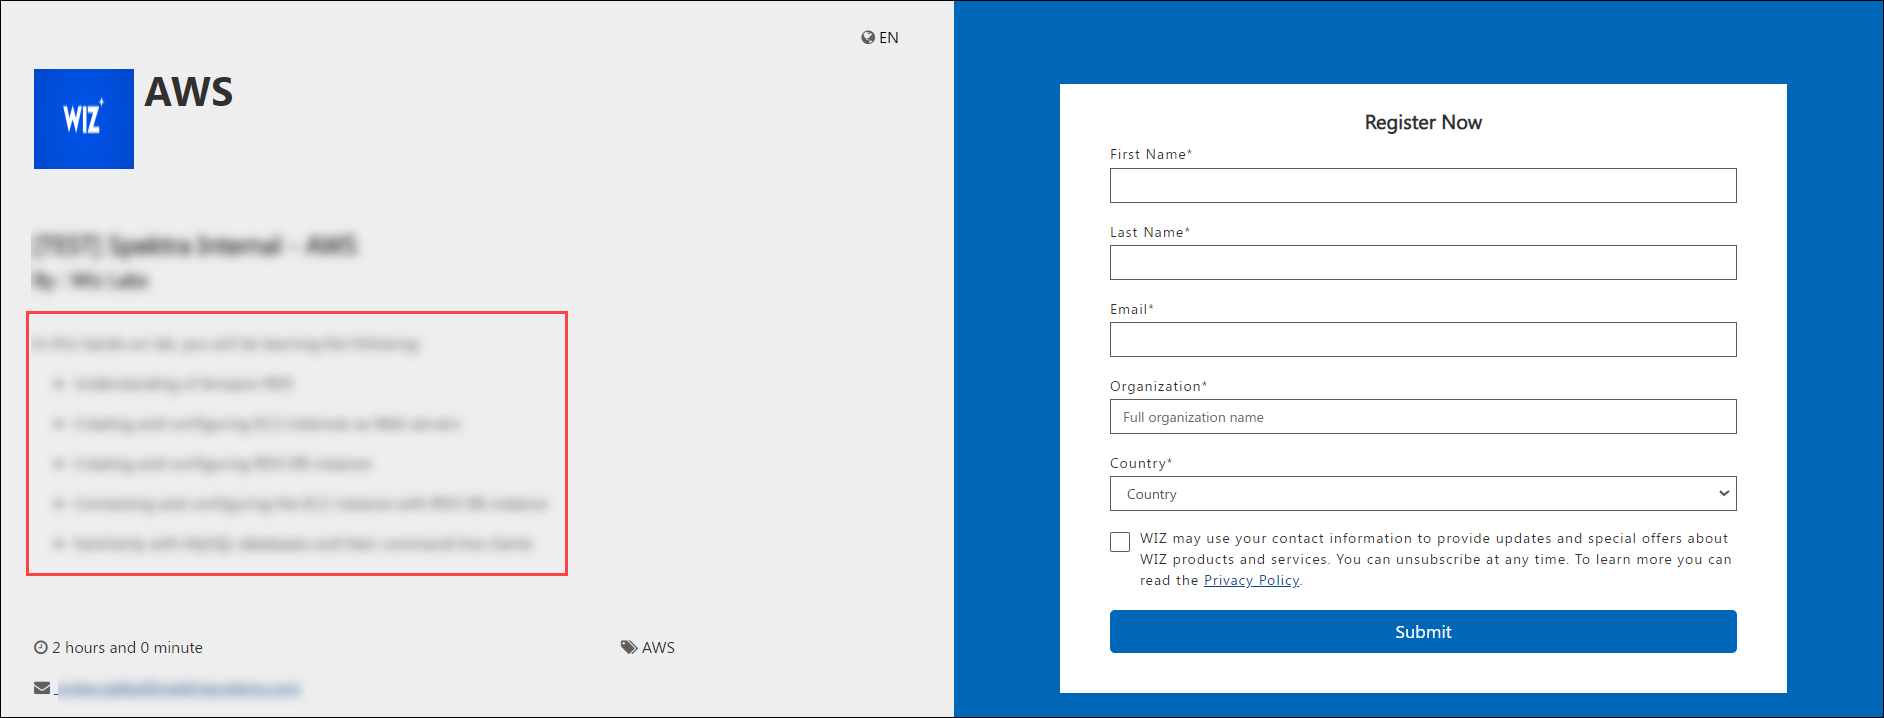
Description: Provide a brief description to describe your lab, its resources and technologies, as well as its learnings and benefits. It will be visible to the end users in the Bit.ly URL link where they will register for the lab.
Lab Launch Page Description: The Lab Launch page is basically where you launch your lab environment. You can add any additional instructions to this page that you think are relevant for the users.
B. Moving on to the next section, we will learn about the fields listed below:
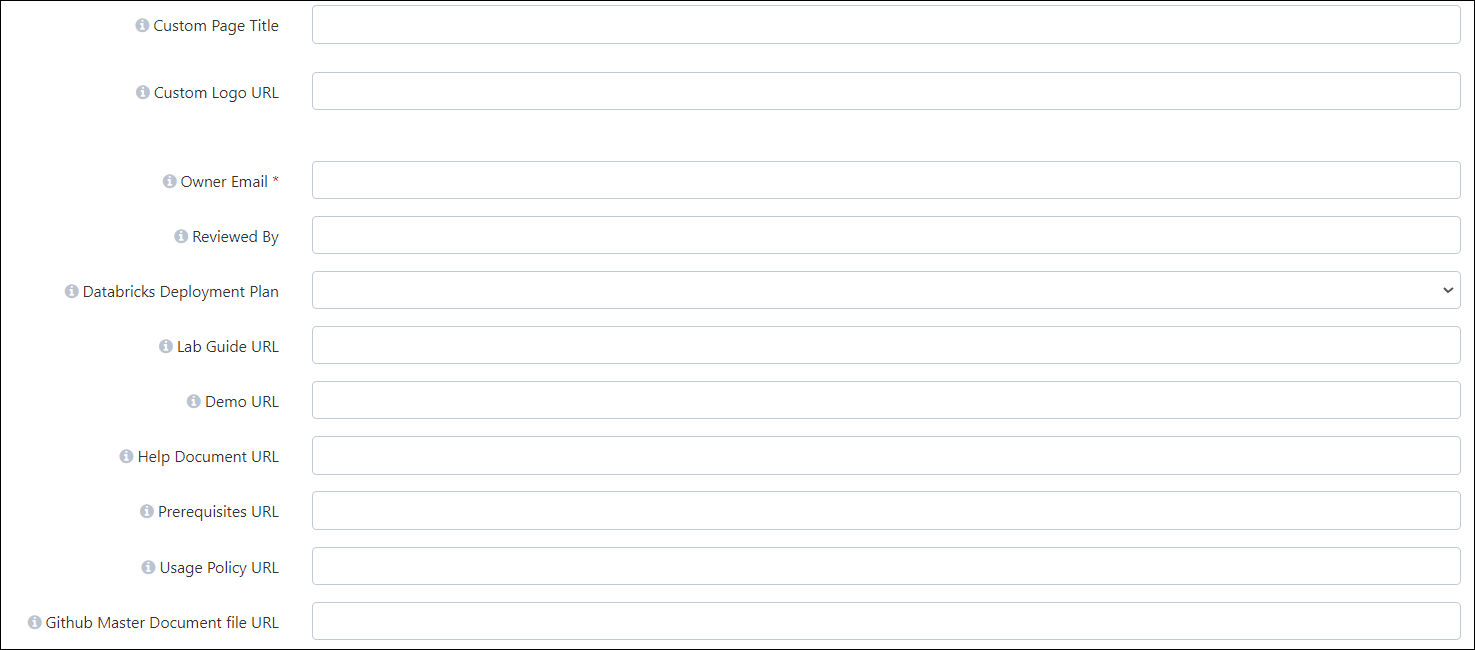
Custom Page Title: If you want to customize the title of the Hands-on-Lab Registration page, you can provide a title in this field.
Custom Logo URL: If you want to customize the logo of the Hands-on-Lab Registration page, you can provide the URL of the logo in this field.
Note: The default page title and logo will be displayed, but if you wish to change them, you can use this field. End-users will be able to see it on the hands-on lab registration page, allowing you to customize what you want them to see.
Owner Email: In this field, you have to provide the email address of the person who is responsible for building the Template.
Reviewed By: This field serves the purpose of capturing reviewer information responsible for assessing the template configurations.
Lab Guide URL: A lab guide is a document that gives users all of the directions they need to complete a hands-on lab. The lab guide URL can be entered here, and it will appear on the users' lab details page. The lab guide will be available to them once they have accessed the URL.
Help Document URL: If you want to provide users with a help manual that will assist them in completing the lab, you can place that document URL here.
Prerequisites URL: If you wish to give people visibility into how the lab is set up or how the pre-requisites for the lab are defined, you may write a document and enter the URL here.
Note To allow the URLs to be entered here, all documents should be in GitHub or PDF format. The users will be able to access these documents by just clicking on the URLs.
Usage Policy URL: The usage policy is used to monitor cores and clusters of AWS resources. In the policy, we have to define a maximum limit of cores/clusters that are allowed for a user.
The usage policy revolves around these AWS resources - EC2 Instance Cores, Instance Count, ECS, and Dynamo DB.
For example: You prepared a policy in which the allowed value for the EC2 instance is set to 4 vcpu cores. Now we have two users - User01 and User02, performing the same lab. User01 creates a VM that uses 2 cores, and User02 creates a VM that uses 8 cores.
Here, for both users, we will have two different cases, as follows:
Case 1: User01 with 2 cores falls under the allowed value and will not violate the usage policy.
Case 2: User02 with 8 cores exceeds the allowed value, resulting in violating the usage policy.
Once the policy is violated, you will be alerted via email.
To receive the alert emails, a person or team can provide their email address while setting up the lab.
To view a sample of the usage policy, go to this link : https://usage-policies.s3.amazonaws.com/aws-usage-policy-all.json
Github Master Document file URL: It is recommended to use JSON-formatted document with section-by-section raw GitHub URLs. It will load VM on the left side of the browser and the Lab Guide on the right.
Note: The VM will boot on the left only if RDP over HTTP is selected; otherwise, the lab guide will appear in full-page view.
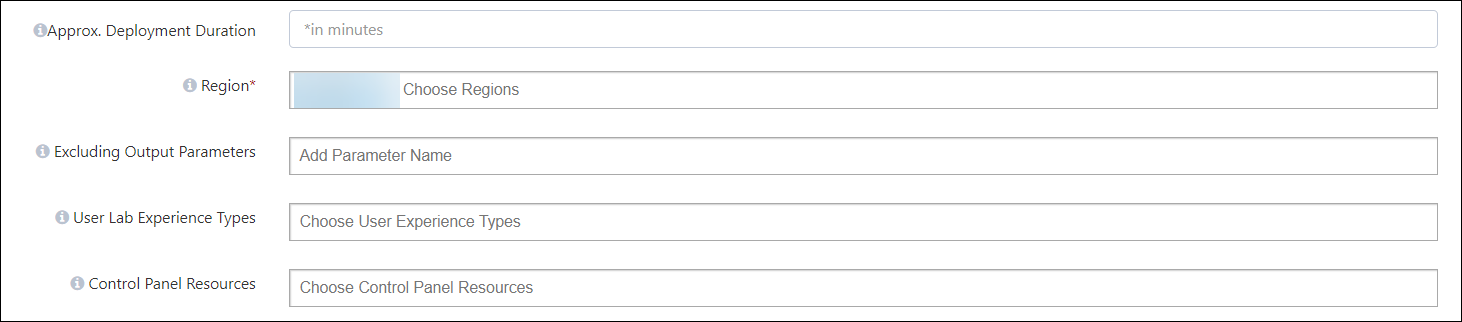
Approx. Deployment Duration: Your environment's pre-requisite resources will take some time to deploy. The expected deployment duration will be defined throughout this time period. The period you enter in this area will be displayed to users as a countdown to the start of the lab.
Region: Select one or more AWS regions for your resource deployments. These selections will be reflected in the lab setup. This setting primarily applies to resources deployed via CloudFormation Templates (CFT). Users can still change the region and deploy resources independently
Excluding Output Parameters: In this option, we can specify any output parameters that need to be excluded from the ‘Environment Details’ tab.
User Lab Experience Types: Select experience types for the lab.
- RDP over HTTP: This feature loads the VM on the left side of the browser and the Lab Guide on the right.
Control Panel Resources: Here we can mention the resources that will be visible in the Control Panel. The Control Panel is a centralized interface where you can monitor and manage various system resources and settings, including user management, audit logs, virtual machine operations (start/stop/manage), task scheduling, permissions, cloud costs, and user reports.
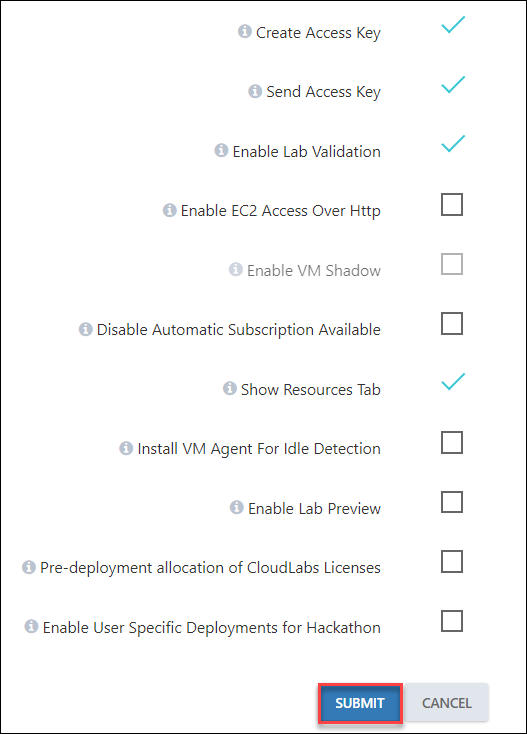
C. In the last section, we will learn about the features that can be enabled:
- Create Access Key: This feature enables the access for the users to connect to AWS by creating an access key for them.
- Send Access Key: Enabling this feature will share the access key details with the user.
- Enable Lab Validation: Lab validation enables you to check whether lab tasks are completed appropriately. In case the user had issues performing the lab, that can be checked under validations.
- Enable EC2 Access Over Http: This option allows you to access the EC2 through the web browser.
- Enable VM Shadow: Shadow feature allows instructors to shadow the user's environment / VMs (virtual machines) and provide support in real-time
Note: To use this option, first we need to enable the Enable EC2 Access Over Http option.
- Disable Automatic Subscription Available: This option allows you to Manually clean the subscription and update the availability status.
- Show Resources Tab: This option allows you to display VM operations in the attendee Environment Resource page.
- Install VM Agent For Idle Detection: VM idleness tracking is supported in AWS but is limited to certain images, such as Windows and a few Linux distributions.
- Enable Lab Preview: This option allows you to view the Labguide preview.
Note: Provide the Masterdoc URL in the Preview URL section.
- Enable User Specific Deployments for Hackathon: If enabled a set of resources specific to the user can be deployed by adding a cloud template in the user-specific cloud template section
At last, click on the SUBMIT button to save all the configurations.
Once you've submitted the template, you'll be directed to the main Template page, where the template you created will be listed as shown in the image below. Now you have to reopen the template to configure other available functionalities, so click on the Edit button.
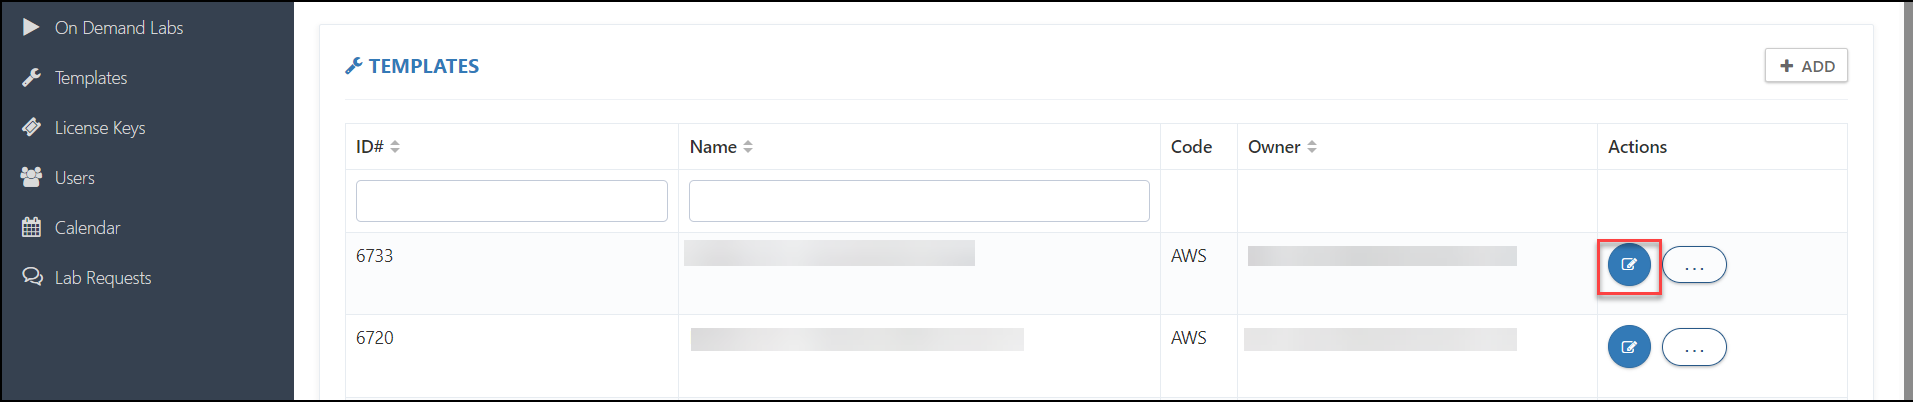
Here you will have access to the following functionalities in order to fully configure a CloudLabs Template:
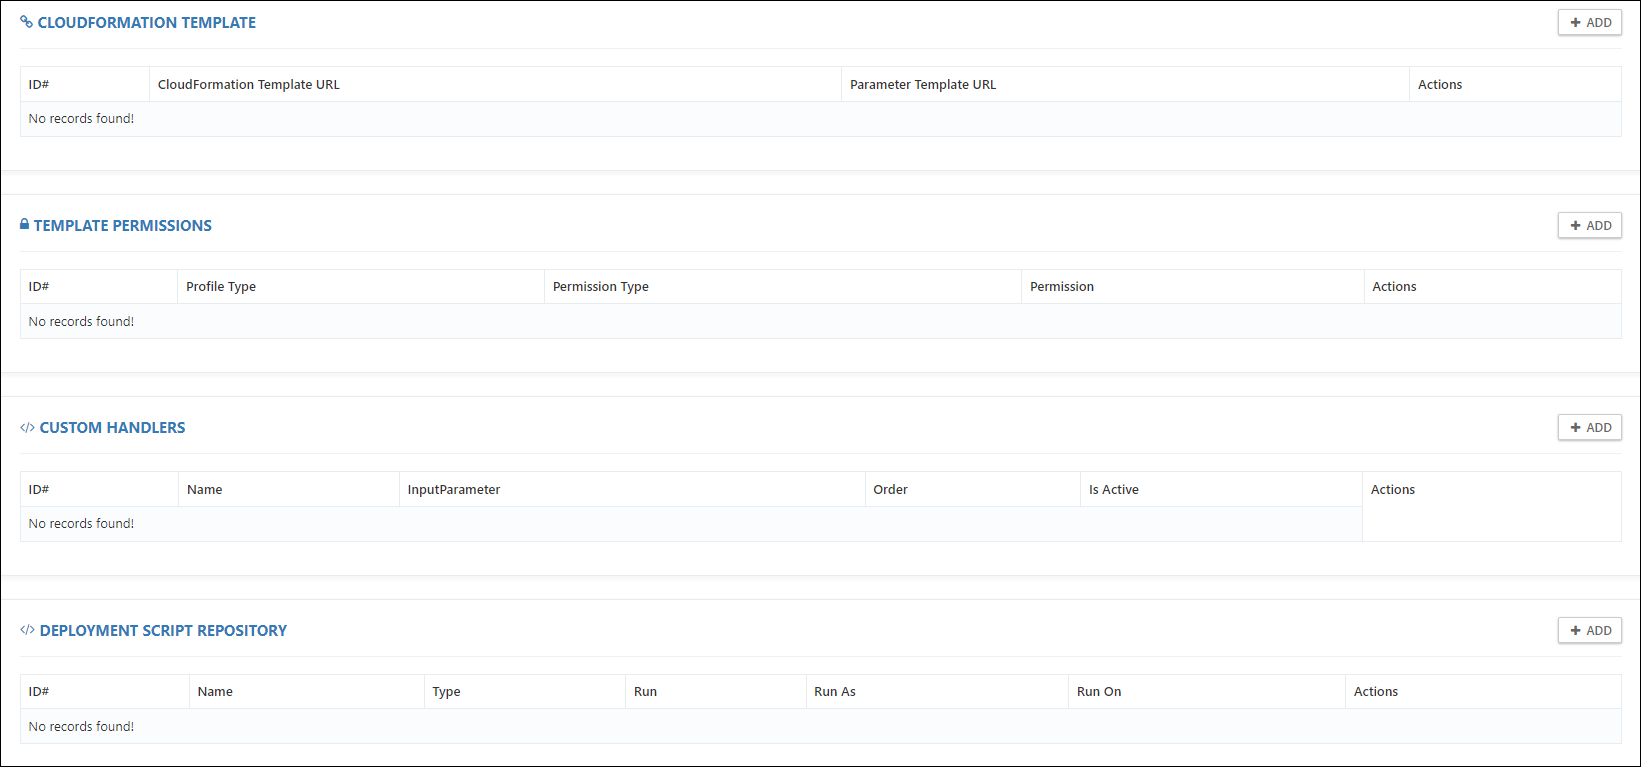
CloudFormation Template
Template Permissions
Custom Handlers
Deployment Script Repository
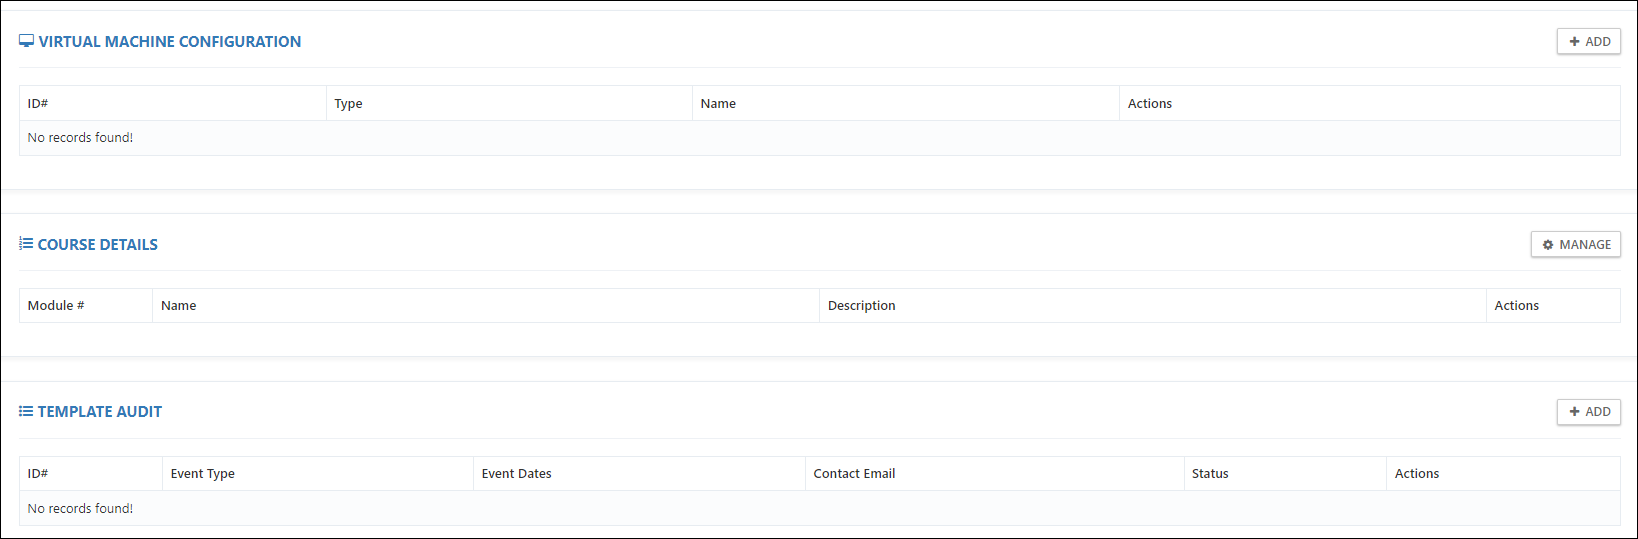
Virtual Machine Configuration
Course Details
Template Audit
Now we'll have a look at each of the features to understand how they work.
CloudFormation Template
As the name suggests, you will provide the CloudFormation template files here to provision your lab environment.
CloudFormation template file: The CloudFormation Template is a JavaScript Object Notation (JSON) file that outlines your project's infrastructure and settings. The resources required for deployment, as well as their properties, must be specified in the template.
A CloudFormation Template has the following sections:
Parameters - In the parameters section of the template, you specify which values you can input when deploying the resources.
Variables - In the variables section, you construct values that can be used throughout your template. You don't need to define variables, but they often simplify your template by reducing complex expressions.
Resources - In the resources section, you define the resources that are deployed.
Outputs - In the outputs section, you specify values that are returned from deployment. Typically, you return values from resources that were deployed.
For your reference, here is a sample CloudFormation Template:
- Parameter file: Rather than passing parameters as inline values in your CloudFormation Template, you can use a JSON file that contains the parameter values. The parameter names in the parameter section of your CloudFormation template and Parameter file must match.
For your reference, here is a parameter file sample:
https://spektra-cft-templates.s3.amazonaws.com/Sample_Parameters.json
Note: The CloudFormation Template & Parameter files must be stored in the S3 Storage Bucket. The storage bucket and the objects must be publicly accessible, steps to make a bucket public are described here Creating a Bucket with Public Access once the files are uploaded you can retrieve the URL & provide it in the CloudFormation details tab in the CloudLabs Template. CloudLabs only supports JSON (Java Script Object Notation) file format. If you have a YAML file & want to convert it into JSON here is the link to convert it: YAML to JSON Converter
To learn more about the CloudFormation Template, check Create and deploy your first CloudFormation Template.
Follow the steps below to get started:
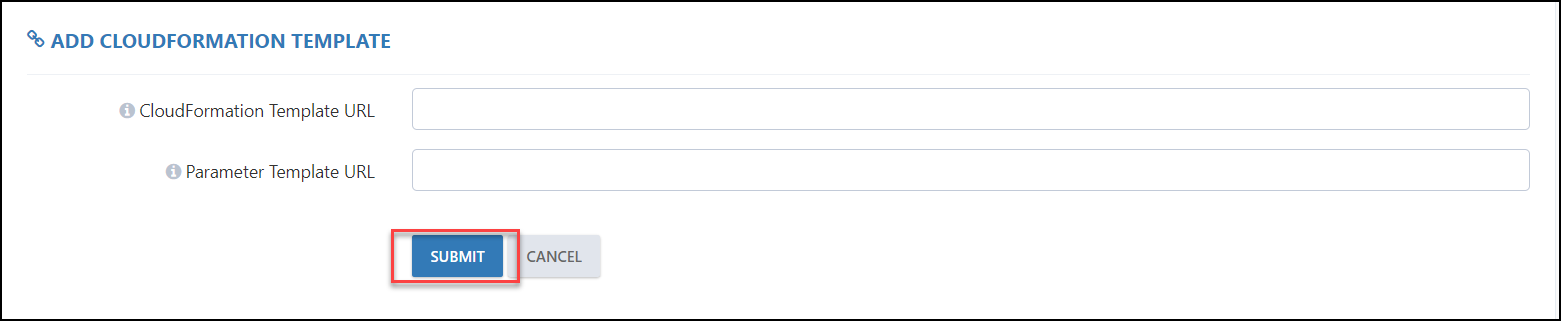
Click on the + ADD button.

Fill up the below sections:
CloudFormation Template URL: Add the CloudFormation Template file URL here.
Parameter Template URL: Add the parameter file URL here.
Click on SUBMIT to save the configurations.
TEMPLATE PERMISSIONS
To provide access to various AWS services & IAM, you assign custom permissions. Template permissions allow you to control who has access to AWS resources, along with what they can do with them and what areas they may access.
Here are some examples of what you can do with template permissions:
Allow a user to create and manage AWS resources like S3, EC2, RDS, etc. with limited or full access to these resources.
Allow users to create IAM users, groups, and attach policies.
Now we will learn how to assign permissions on the CloudLabs Template.
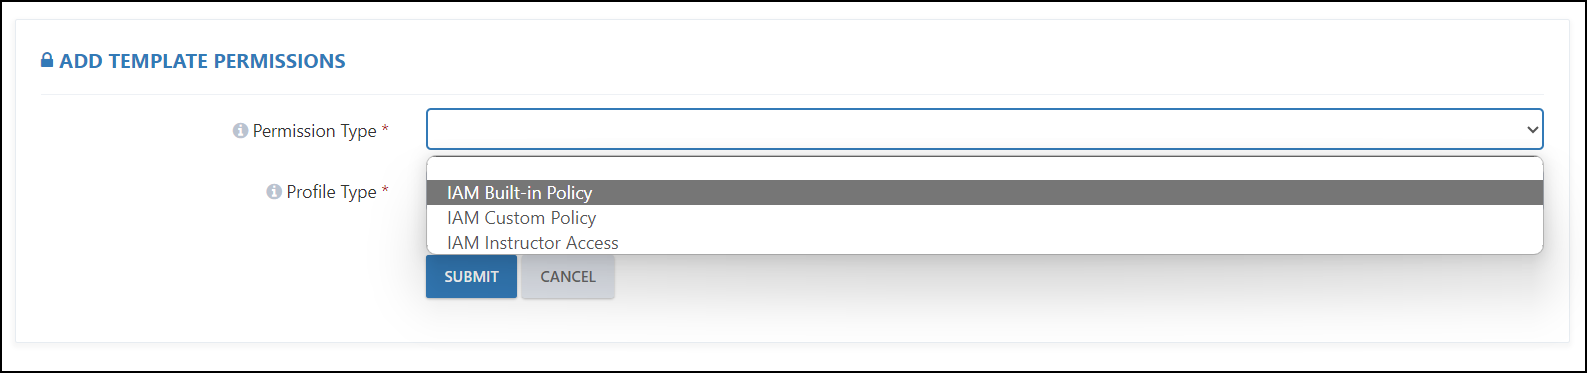
Click on the + ADD button.

Note: If you have pre-deployed ODLs, click here to view the steps on how to apply these permissions.
- Now fill up the following sections:
Permission Type: Here we have three types of permissions -
- IAM Built-in Policy: It provides an option to attach AWS Managed permissions to the users.
- IAM Custom Policy: If we want to provide restricted access to AWS services to users, then we can select this option.
- IAM Instructor Access: This option can be used to provide access to instructors.
All further configurations are based on the permission type you select. To make it easier for you to understand how each permission type works, we have divided them into three cases:
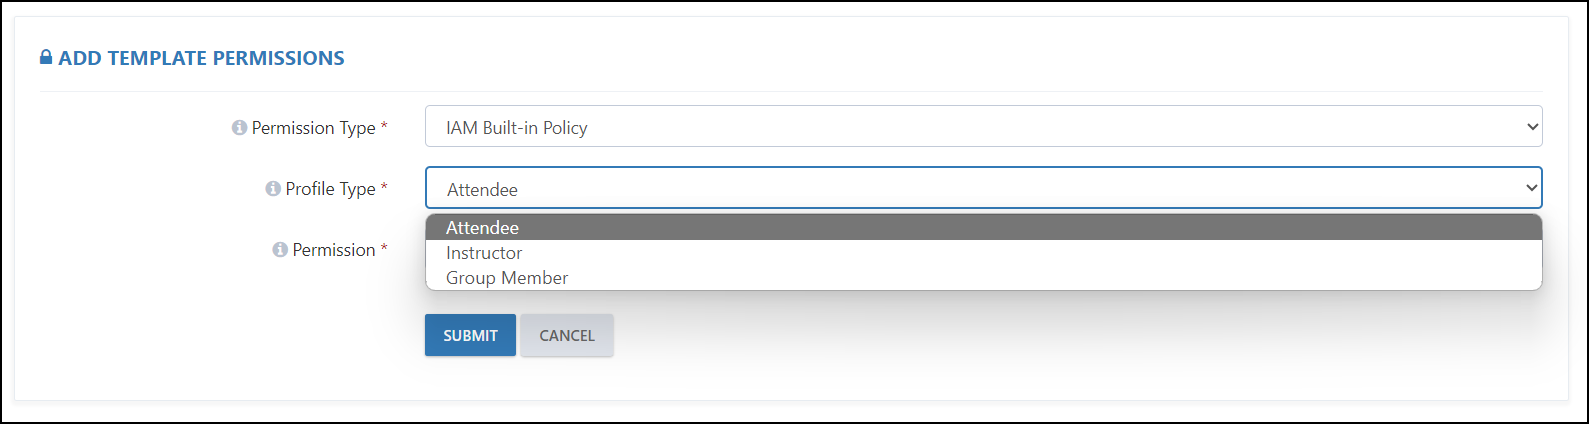
Case 1: If you select the IAM Built-in Policy, then you will have the following configurations available:
Profile Type: Here we have three types of profiles:
- Attendee: Select this option if you want to assign permission to a user.
- Instructor: Select this option if you want to assign permission to an Instructor, Mentor, or Proctor.
- Group Member: Select this option if you want to assign permission to a team member who is a part of the Hackathon Team.
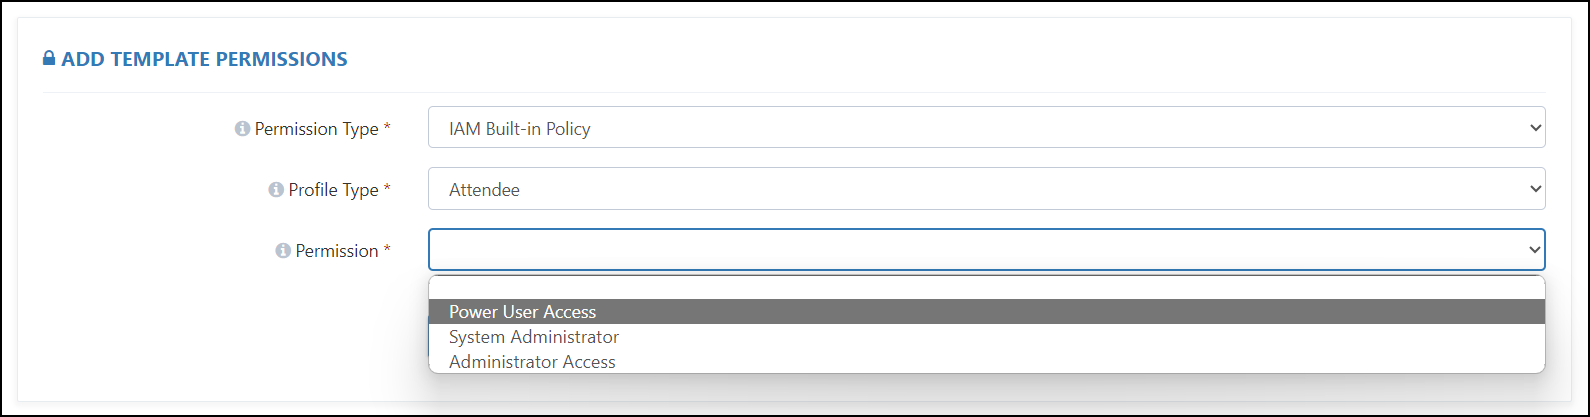
Permission:
- Power User Access: Provides full access to AWS services and resources but does not allow management of users and groups.
- System Administrator: Grants full access permissions necessary for resources required for application and development operations.
- Administrator Access: Provides full access to AWS services and resources.
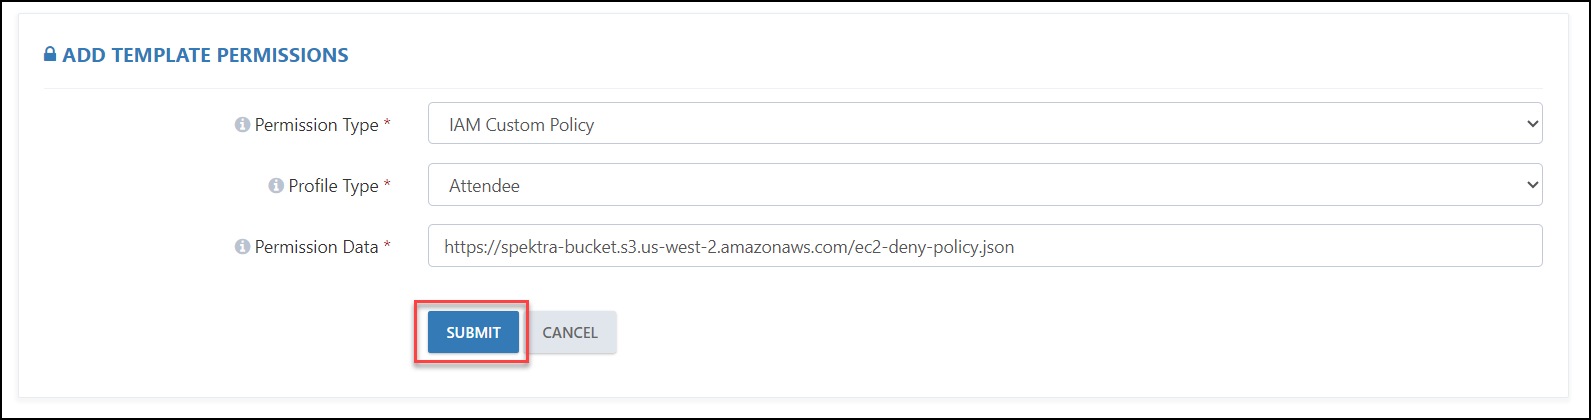
Case 2: If you select IAM Custom Policy, then you will have the following configurations available:
Profile Type: Here we have three types of profiles:
- Attendee: Select this option if you want to assign permission to a user.
- Instructor: Select this option if you want to assign permission to an Instructor, Mentor, or Proctor.
- Group Member: Select this option if you want to assign permission to a team member who is a part of the Hackathon Team.
Permission: Here we can provide the link to the custom IAM policy created to provide access to various AWS services, along with conditions for accessing resources.
Sample AWS Custom Policy for reference: https://spektra-bucket.s3.us-west-2.amazonaws.com/ec2-deny-policy.json
At last, click on the SUBMIT button to save it.
Case 3: If you select IAM Instructor Access, then the Profile Type & Permissions will be auto-populated and Organizational Access Role will be granted to the instructor.

Note: The Custom Policies are to be built in JSON (Java Script Object Notation) Format & stored in an S3 bucket where the bucket & objects are publicly accessible.
Deployment Handlers
This feature allows you to pre-deploy some resources, like Key-Pair, Default VPC and Wiz Handler.
Take the steps below to get started:
Click on the + ADD button.

In the Add Custom Handler Association, select the custom handler for the resource that you want to pre-deploy.
In the Input Parameter, provide a JSON file containing the details of the region where the resource is to be deployed.
Check the checkbox next to the IsActive (1) parameter, and click on the Submit (2) button.
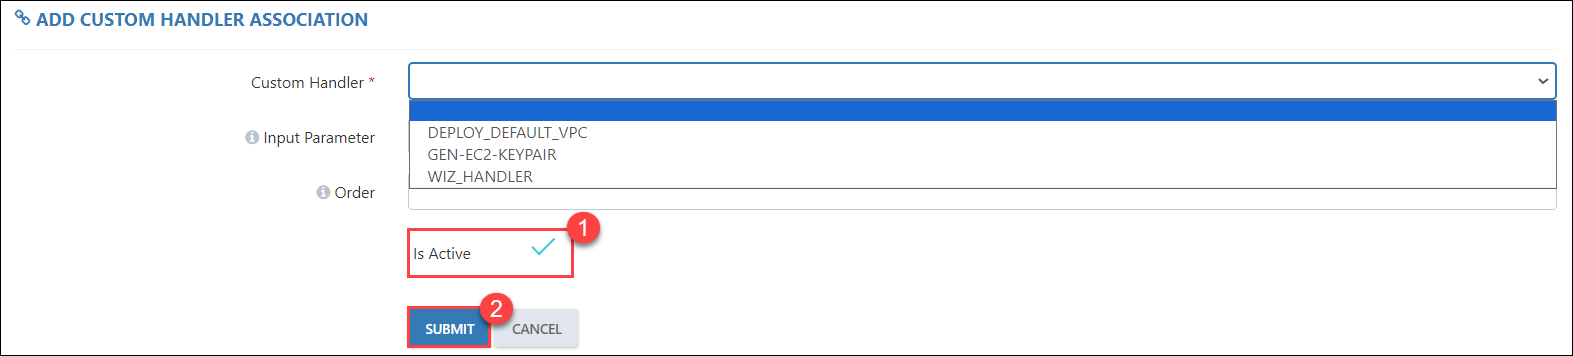
Note: In the above screenshot, we are deploying a default VPC using the Custom Handler. Here, we need to provide a JSON file (ClouLabs supports deployments in JSON), which specifies the region where the resource is to be deployed.
Here is the sample file for deploying a default VPC through a custom handler in the asia-south1 region:
https://spektra-bucket.s3.us-west-2.amazonaws.com/DEPLOY_DEFAULT_VPC.json
Note: we are also deploying a Wiz Handler using the Custom Handler. Here, we need to provide a JSON file (ClouLabs supports deployments in JSON).
Please find some of the examples below that can help in the creating the custom handler:
Permission for GLOBAL RESPONSE ANALYST and GLOBAL CONTRIBUTOR:
Permission for GLOBAL CONTRIBUTOR and PROJECT ADMIN:
Permission to allow GLOBAL CONTRIBUTOR:
https://experienceazurecloud.blob.core.windows.net/custom-handlers/wizlabs_global_contributor.json
Permission to select a different tenant by providing the TenantShortName and OutputValues:
https://experienceazurecloud.blob.core.windows.net/custom-handlers/wizctf_global_contributor.json
Virtual Machine Configuration
To configure RDP Over HTTP, follow the instructions provided in the guide below:
https://docs.cloudlabs.ai/LabDeveloper/EC2OverHttps
Course Details
To configure the validations, follow the instructions provided in the guide below:
https://docs.cloudlabs.ai/LabDeveloper/PowerShellBasedValidations
Template Audit
Template audit logs are structured records that document changes, updates, and other significant events related to a template. These logs are essential for tracking modifications, ensuring accountability, and maintaining the integrity of the template management process.
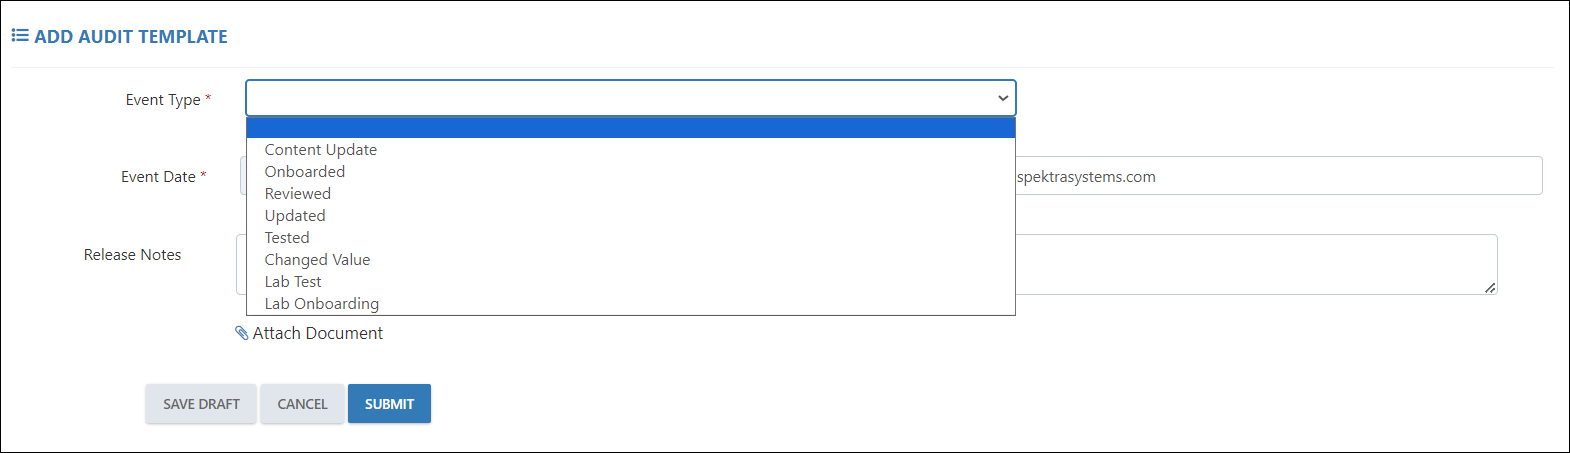
Each entry in the audit log captures specific information:
- Event Type: This describes the nature of the event (e.g., Content Update, Onboarded, Reviewed, Updated, Tested, Changed Value, Lab Test, Lab Onboarding).
- Event Date: This records the date when the event occurred.
- Release Notes: This section provides additional details about the event, such as what changes were made or the purpose of the event.
Best Practices: Adding AWS Templates
It is recommended that you provide the Description at the template level so that whenever you create multiple ODLs from the same template, you do not need to add a description at each ODL level; it is automatically configured.
Add Owner Email to identify the person responsible for building the template, so that whenever there is an issue with the template configurations or while accessing the lab environment, you can reach out to the template owner.
Usage Policy URL and GitHub Mater Document URL must be in JSON format.
Make sure to follow the below format while creating a GitHub Master Document:
Name: Here you must provide a name for your Lab.
Language: English
Files: In this section we provide the Raw File Path and Order of the file lab guide that should be available on GitHub.
Raw File Path: This is the raw URL of the pages in your lab guide.
Order: Defines the sequence of the pages in your lab guide, such as what should come first and so on.
Choose one or more AWS regions where you want to have the AWS resource deployments to avoid any service or SKU quota issues. It is recommended that you deploy the VM in the same Azure region and use the nearest region to avoid the latency.
Enable the Create Access Key flag if you want the users to access the AWS console through Command Line (CLI), and to share the details with users, enable the Send Access Key flag.
The CFT and the parameter file must be saved as .json, for example:
Template: deploy01.json
Parameter File: parameters01.json
While developing a new lab (dev - phase), you can attach an Administrator Access policy to the user so that there are no conflicts or errors while deploying any kind of resources, and once the lab development is completed, the IAM custom policy must only have permissions over the resources required to complete the lab, so that the users cannot deploy anything besides the lab guide. Following this practice eliminates any misuse or abuse of the AWS resources by the users and is cost-effective.
While configuring the deployment handler, ensure that the formatting is correct & the format in which the deployment handler configuration file is created is JSON.
When configuring the GitHub master document file URL, ensure you add the following Substring if the repository is private:
https://docs-api.cloudlabs.ai/repos/Finally this is how your GitHub Master Document URL will appear which you will be using in CloudLabs template.
Note: Before adding the Masterdoc link in the template, ensure that you have created the LABGUIDE ACCESS TOKEN in the specific tenant.
Consider the following while troubleshooting the template Issues:
Handling Default VPC:
When a default VPC issue arises, create a custom VPC using a CloudFormation template.
Here is the sample file for deploying a Custom VPC:
Handling CAPABILITY_NAMED_IAM:
When deploying IAM resources from CloudFormation templates, include the CAPABILITY_NAMED_IAM parameter. Additionally, ensure the parameter file includes the CheckAcknowledgement parameter set to TRUE:
Here is the Parameter that as to be included in the Parameter File:
 "parameters": {
     "CheckAcknowledgement": {
         "value": "TRUE"
     }
 }
Ensuring Correct Syntax: When deploying resources through CloudFormation templates, always ensure the correct syntax is followed. Verify the structure,
indentation, and parameter references are correct to avoid deployment errors. Use JSON or YAML linters and AWS CloudFormation validation tools to check the syntax before deployment.AMI mapping Issue:
Below is an example syntax demonstrating the utilization of the RegionMap:
{
  "Mappings": {
    "RegionMap": {
      "us-east-1": { "AMI": "ami-055744c75048d8296" },
      "us-east-2": { "AMI": "ami-0bb220fc4bffd88dd" },
      "us-west-1": { "AMI": "ami-0bdb828fd58c52235" },
      "us-west-2": { "AMI": "ami-0a588942e90cfecc9" },
      "eu-west-1": { "AMI": "ami-047bb4163c506cd98" }
    }
  }
}Note: AMI IDs keep changing, so please monitor them accordingly.